The Photo post
En este post quiero recolectar la mayoría de las ligas que no he publicado que tengan que ver con fotografía, ya sea digital o tradicional:
Photo.net tiene buenos tutoriales para principiantes en adelante. El estilo de los tutoriales es personal y se basa mucho en la observación de como su compañera de estudio Elsa Dorfman hace su trabajo :
Un ejemplo de photo.net de que lentes utilizar para retratos:
Lens.
If you want to flatter your subject, you'll probably want to deemphasize his nose. That means you want to stand at 10 or 15 feet away from him so that his nose isn't significantly closer to you than the rest of his face. However, at such a large distance from the camera, if you want to fill the frame with just your subject's face, then you need a high magnification (i.e., telephoto) lens. Typical "portrait" lenses are therefore between 90 and 135 millimeters long (for 35mm cameras). Many professional fashion photographers use 300mm or 600mm lenses, resorting to using a walkie-talkie or bullhorn to communicate with the model!
photo.net Learn Photography
Morguefile es una buena fuente de imagenes libres de copyright, no de derechos (con su licencia Creative Commons) 
morguefile :: archive
que también tiene unos tutoriales muy buenos con tareas y areas de discusión. Ejemplo de la lección uno:
Number one: Get in close. No, closer. Nope, still closer. There! You've got it!
The first, and most important, rule: Simplify. The more you simplify a photo, the more attention you draw to your subject. The more attention you draw to your subject, the more successful you are in communicating your message to the viewer. There are roughly a million and two ways to do this, so I'll keep it simple and stick to my favorite technique here, and that's to get in as close as possible, thereby eliminating anything in the background that may detract from your subject.
Morguefile :: free stock photos
Ken Rockwell y su ambiciosa pero merecida página "How to do Anything Photographic" tiene desde reseñas de equipo hasta tutoriales diversos.
ejemplo del ISO en fotografía de deportes:
ISO
Use whatever ISO you need with digital cameras. Don't be afraid to pump it up to get shorter shutter speeds and smaller apertures since digital SLRs look great at ISO 400 and 800.
Of course if you're in daylight and have an f/2.8 lens then keep the ISO as low as you can, but if you've got an f/5.6 telephoto zoom crank it up.
Indoors and at night feel free to crank it all the way up, even to ISO 1,600 or 3,200. It's far better to have a sharp, grainy picture than a noiseless soft blurry one. Nikons look fine even at the +1 push setting if you need it and look really nasty at the +2 push setting.
No need for ISO Auto, although feel free to use it and set the shutter speed below which it operates to 1/500 or your slowest desired shutter. The D70's default of 1/30 is obviously too slow for sports. You set these in the menus.
aunque es un poco Nikon centrico (si también lo invente) aclara que lo mismo aplica para Canon, Minolta, etc.
How to Do Anything Photographic 2005 Ken Rockwell
Guía para fotografiar cascadas: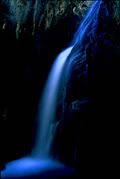
USE SLOW SHUTTER SPEEDS to create a soft, artistic portrait of water. This is what some call the "Angel Hair" effect. Generally, shutter speeds that are 1/8 of a second and slower will yield the best results. A majority of my waterfall photographs fall between 1/4 second and 3 seconds of exposure. The key here is to dare to experiment and not be afraid to shoot a lot of film. You never know what shutter speed is going to render the waterfall the way you see it in your mind's eye. Needless to say, you'll need your tripod when making these long exposures. One more reason to save your money and buy a good quality, full-featured tripod! I also recommend a cable release or self timer on the camera to reduce the possibility of camera shake. A mirror lock up or bean bags can be handy too. Shutter speeds that are too slow may over emphasize the image's special effects. Be selective and do not overdo the "Angel Hair" effect. Leave the natural beauty in the image to power it to the viewer.
Photographing Waterfalls
Pequeña guía para fotos digitales nocturnas:
AnandTech: AnandTech Guide to Better Photos: Night Photography
Imagenes de stock gratuitas:
free stock images
Como hacer mosaicos con otras fotografías: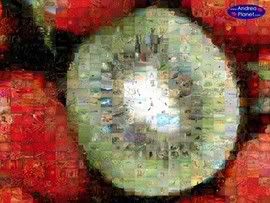
hay opciones para mac y pc
How-To: Make your own photo mosaics - Engadget - www.engadget.com
Pequeña guia de fotografía submarina: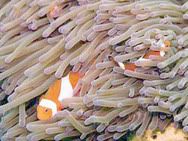
Underwater photography 101
via Gizmodo
y en los Foros de Diseño ~ de isopixel vi esta liga:
Como encontrar buenas fotograf as y otros materiales graficos gratuitos - alzado.org via .oc
posted by Poncho at 4/26/2005 11:36:00 AM
![]()


<< Home